Classic Hummus
Sure, sure…you can buy inexpensive and really delicious hummus at the grocery store. But this wouldn’t be Jacked Kitchen if I didn’t tell you to skip the store bought and make it yourself. Homemade hummus really is much fresher. And, it’s easy to make. And, it tastes great. I promise you can make it with that nice whippy, smooth texture.
Making it homemade lets you dictate what ingredients go into it – maybe you add sun-dried tomatoes or roasted red pepper. Get good at making a base hummus, and then start adding whatever extras you want. In this recipe I already incorporate roasted garlic and toasted pine nuts for a classic hummus, but you can swap them for something else.
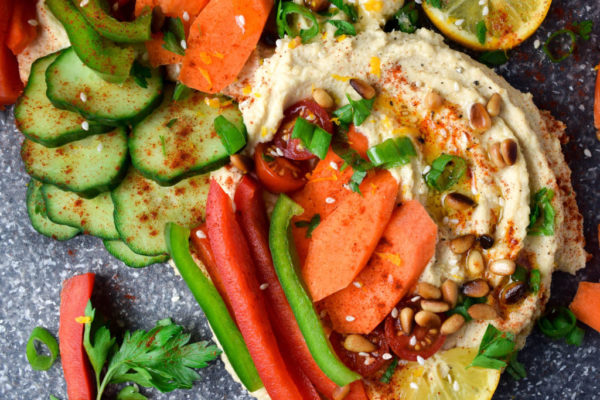
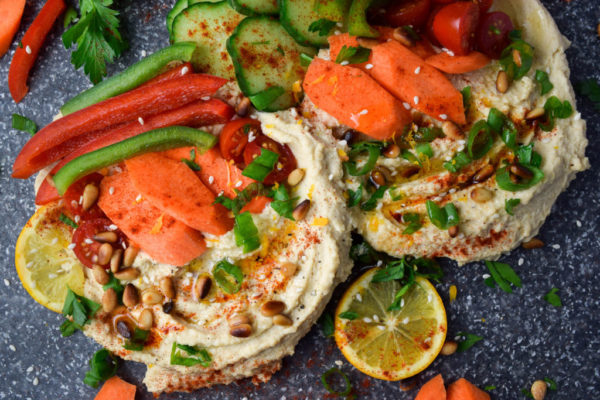
Hummus stores well in the refrigerator if you make it a day or so in advance. Drizzle some extra olive oil, a sprinkle of paprika, and fresh parsley on top and before you know it you have a fancy appetizer. I also like to make a big batch for my packed lunches during the week.
Classic Hummus Recipe
Serves 4-6 (depending on serving size).
Ingredients
- 1 blub of garlic, unpeeled
- 2 (15-ounce) cans of chickpeas
- 1/4 cup pine nuts
- 4 Tbsp Tahini
- 1/4 cup fresh lemon juice, about 2-3 lemons (Fresh lemons taste best, but you can substitute jarred lemon juice. I also like to use Meyer lemons because they are not as tart but regular lemons will work fine.)
- 1/4 tsp cayenne
- 1 – 1 and 1/2 tsp salt
- 1/2 tsp black pepper
- 1 Tbsp sesame oil (if you don’t already have sesame oil you can skip it)
- 1/4 cup olive oil
- 1/4 cup water
- 1 Tbsp fresh parsley
- 1/4 tsp paprika
Directions
- Preheat the oven to 350.
- Cover an entire head of unpeeled garlic in oil, wrap it in foil, and bake it for about 45 minutes to an hour. (I used my toaster oven so I didn’t heat the entire oven.)
- Drain and rinse two cans of chickpeas in a colander.
- Remove the outer peel from each chickpea by pinching each bean with your fingers until the peel slides off. It works best to set up two bowls next to the colander so you can put the skin in one bowl and the bean in the other. It’s time consuming, but worth the extra step.
- In a small skillet heat a drizzle of olive oil over low to medium heat. Add 1/4 cup of pine nuts. Cook the pine nuts for about 4-5 minutes until toasted on the outside. Keep an eye on them and stir often because they burn quickly if your pan gets too hot.
- In a food processor, add the chickpeas and pulse until the chickpeas are broken down into small crumbs.
- After the head of garlic has cooled from the oven, cut off the very top to expose the insides of each clove. Squeeze the garlic cloves into the food processor with the chickpeas.
- To the chickpeas and garlic, add 4 Tbsp tahini, 1/4 cup of lemon juice, 1/4 tsp cayenne, 1 – 1 and 1/2 tsp kosher salt, 1/2 tsp black pepper, 1 Tbsp sesame oil (if using), and almost all of the pine nuts (save some to add on top at the end as a garnish).
- Turn on the food processor and drizzle in the 1/4 cup of water as the hummus begins to combine.
- Continue running the food processor and drizzle in about 1/4 cup of olive oil.
- The hummus will be thick and slowly come together. You’ll want to keep the food processor running for several minutes as the hummus becomes smooth. Add more oil or water if the consistency is too thick.
- Remove the parsley leaves from their stems and roughly chop.
- Serve the hummus with the remaining pine nuts, fresh parsley, sprinkle of paprika, and a squeeze of extra lemon juice.
After I made this batch of hummus I was so hungry that the idea of dipping each individual vegetable, one at a time just sounded like so much work. So in my lazy, famished mood I dumped the hummus and veggies onto a platter and grabbed a spoon. I may have eaten more hummus than is socially acceptable, but it was just more efficient.
Grab a bag of pita chips, any vegetables of your liking, or some naan for dipping. Hoard the hummus all for yourself or make a batch as an appetizer for hosting.
